GHRKit Installation Video & Repair Resources
Home > Repair Resources > Installation
Use these resources to review the GHRKit repair system, confirm the correct application and see the repair area before and after installation.
|
|

Watch the GHRKit Installation Video
|
|
1. Confirm the application
Before ordering or beginning a repair, confirm which GHRKit applies to the drive. GHR1 is for Alpha One and older TRX drives, GHR2 is for Alpha One Gen II, and GHR3 is for all Bravo drives. Volvo Penta and OMC applications are available by special order, with legacy Yamaha applications also supported where applicable.
View applications and part-number cross-references.
|
|
2. Review the damaged repair area
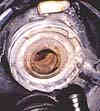
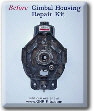
The GHRKit is designed for damage and corrosion at the bellows mounting area of the gimbal housing/transom assembly.
See damaged and corroded gimbal housings before repair.
|
|
3. Understand the bonding system
The fitted GHRKit repair ring is bonded to the prepared housing surface with GHRKit Space Age Epoxy.
See the Space Age Epoxy bonding demonstration.
|
|
4. See the repair after the GHRKit is positioned
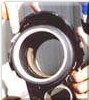
The after-repair photos show the GHRKit in the repair area and provide a visual reference for the finished position.
See the GHRKit after repair.
|
|
Use the instructions supplied with the GHRKit for the actual installation.
This web page organizes supporting resources and does not replace the instructions provided with the kit. If the drive application or condition of the housing is uncertain, contact GHRKits before proceeding.
|
|
View the original GHRKit | GHRKit FAQ | View current pricing | Contact GHRKits
|